Etude on leather
I've been investigating ways to put computer-generated art and lettering on books, primarily to imitate gold stamping. The method shown here is very much a work in progress, but I'm satisfied that the results are good enough for my projects. So far I've only put titles on cloth-bound books, but experiments with leather, as shown below, look promising.
I won't discuss all the methods I've investigated here because most readers will want to get on with finishing their books. For those who want to go deeper and hopefully improve this process, I've written up a discussion of alternatives.
This technique is based on what I learned from reading and practicing the methods published by Frank Miller at Pulsar for his DecalPro product.
I have departed slightly from his technique in ways I feel improve the results when putting titles on cloth, but I still recommend a visit to the Pulsar site for materials and further instruction.
An important advantage of this process over all others I've tried is that you get gold letters without any decal backing. It is also an advantage that no water is used on the cloth itself. You can put a gold title on a finished book.
Another advantage is that the DecalPro method is by no means limited to gold: all sorts of metallic foils and/or color laser printing can be transferred.
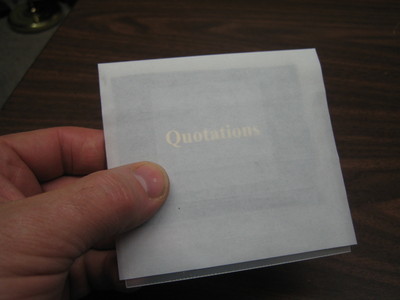
The original art is laser printed on special toner-transfer paper. Then gold is bonded to the toner on the paper using special foil and a hot roller laminator. A thin Mylar film is placed over the image and run though the laminator again. When the paper and mylar are soaked in water, the mylar floats free taking the gold letters along. This mylar "decal" is ironed onto the cloth. The toner under the gold melts and bonds to the surface. The mylar can then be pealed off, leaving only the letters. A dilute matt varnish is applied to the whole book. This helps bond the letters and protects the book from water damage.
You need a laserprinter. There are, unfortunately, two kinds of laserprinter:
The older printers apply a thicker layer of toner and it is designed to fuse at a lower temperature. This toner can be reheated and made sticky again, which is essential to make the toner transfer process work. The newer "type 2" printers use a high temperature toner that is fused in a very thin layer. It is one-shot process and cannot be used for toner transfer.
The inventor of the toner transfer process has a web page that describes how to recognized "bad" laser printers. The short answer is that most black and white laser printers work except for those made by Brother and also those made by Sharp.
You can buy a kit on the Pulsar website that has nearly everything you'll need to try this method. The kit was less expensive for me than trying to buy just what I needed for gold titles al la carte.
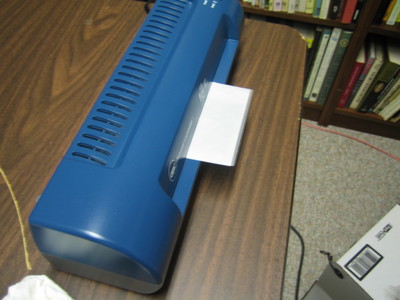
A hot laminating machine is required. These are sold in office supply stores for making plastic laminated documents and cards. Small machines are less than $100. Some are better than others for toner transfer - rather than taking my chances at the local office store, I decided to buy my unit from Pulsar.
You need a hot air gun. These are sold in craft shops and also in electronics tool shops (for heat shrink tubing.) They look like hair dryers but run much hotter. Mine will light paper on fire at close range.
I prefer to use techniques that are "open source:" I don't like to depend on proprietary products from companies that may die with their secrets. The Pulsar DecalPro process is relatively open: I've tried using other brands of foil and transfer paper: The process works well with some combinations and poorly with others. If you want to try things out without buying stuff in bulk, the Pulsar kit is a great way to get started.
If you plan to do a lot of gold titles, the best bulk film I've found so far is from Therm-o-type. They sell many types of foil. The one you want has a matte backing and is called "High Speed Fusing Foil." A 100 foot roll 12 inches wide costs (in 2010) $21.00. Crown Roll Leaf sells a similar product (perhaps the same?)
I'm still looking for a toner transfer paper manufactuer. There are countless web businesses that get it somewhere and mark it up 900%. Currently, I'm evaluating a large box of samples from Neenah Paper. Their technical support is excellent but I'm worried that they'll expect me to order a freight car load after pestering them so much.
The other supplies are generic:
I've found a super low cost way to do away with dependency on store-bought toner transfer paper: Simply squeegee some Elmer's Washable School Glue Gel onto ordinary printer paper. Using a heavier paper reduces curling, but regular 20lb stock works great. You don't have to apply glue to the whole sheet, just spread it on the area where the label will be printed. Any hard plastic straightedge works fine for a squeegee. Dry the paper with your hot air gun and run it through the hot laminator on a large backing board to flatten out the wrinkles. Proceed as outlined below.
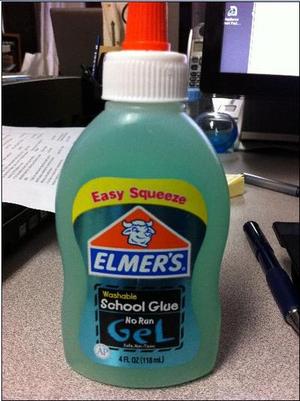
I'm very excited about this gel glue discovery. It works as well if not better than the commercial paper. I used to think toner transfer paper was made with dextrin. I even made dextrin by hand in my kitchen oven and coated some paper. It didn't work very well and certainly wasn't worth the trouble. I now believe the secret of transfer paper is polyvinyl alcohol, which is the primary ingredient in Elmer's School Glue.
If you're insanely cheap, you can buy polyvinyl alcohol powder by the pound and mix up your own liquid coating. But a small bottle of Elmer's washable glue lasts a long time and you can find it everywhere. I no longer worry about the cost of making gold titles.
Before launching into a photo essay, here's a quick rundown of the steps required to put on a gold title. Once you've practiced this a few times, it takes about 10 minutes to do one label, but if you're making lots of books, much time can be saved by creating multiple labels on one sheet.
I use this list of steps when I've been away from the process long enough to need a reminder. You will probably want to skip this on your first reading and proceed to the photos in the next section.
These steps follow the method illustrated on the Pulsar website until we get to attaching the decal to the cloth. The top coat of varnish takes the place of the the spray adhesive Pulsar recommends for bonding decals without heat.
The cover cloth should be cut to the final size. (As described in my bookbinding tutorial.) Pin the cloth to a board by the corners and apply a thin uniform coat of water-based polyurethane varnish. Set aside to dry.
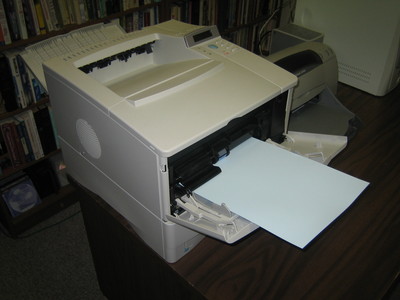
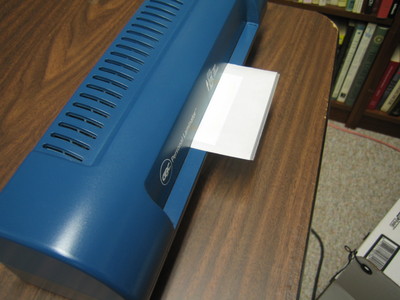
I used the sheet feeder because the transfer paper is a bit too thick to feed reliably on my printer from the main tray.
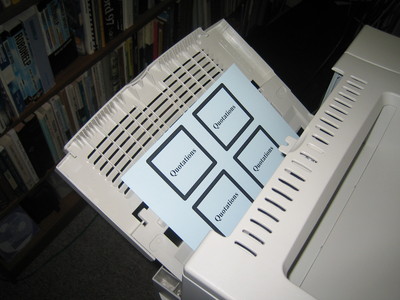
You will want to print a full sheet to allow for mistakes. It does take a little practice to make this process work, but the only requirement is following the instructions exactly.
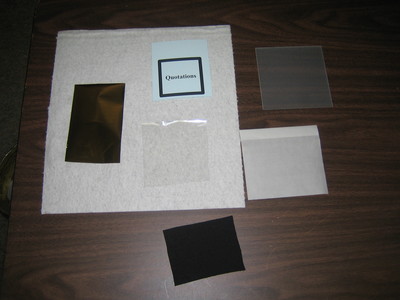
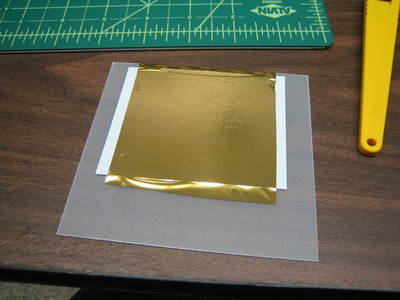
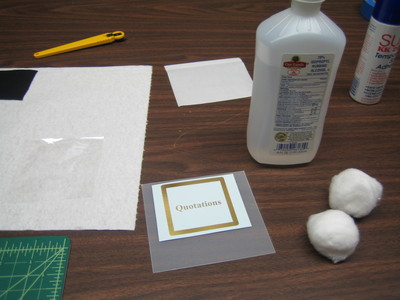
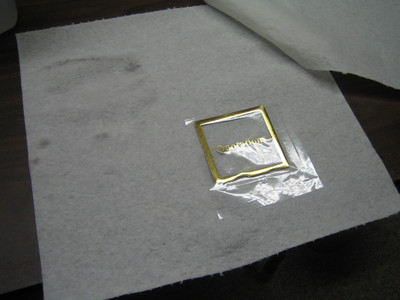
On the paper towel above, you see the gold foil on the left, the original art cut out from the sheet, and a small square of mylar. Off to the right is the fiberglass carrier and below that, a piece of baking parchment with a tab folded over at the top edge. At the bottom of the photo is a black rectangle of fabric used as the target surface for this demonstration.
Take note of the 0.2" border around the title: This will not be part of the final transfer, but it is essential to protect the image at a later step when the letters are transferred to mylar film.
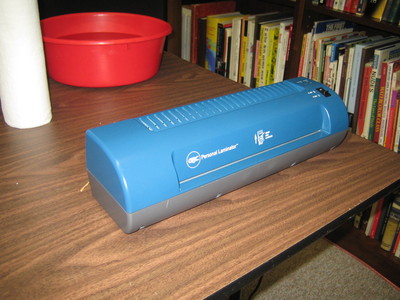
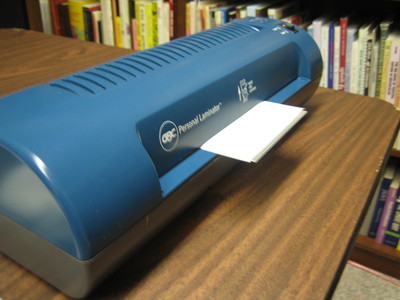
This is the laminator recommend and sold on the Pulsar website. There are others that work and many that don't. I was not in the mood to experiment.
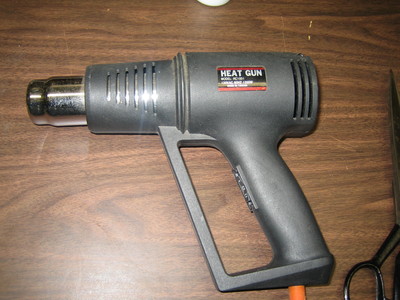
This is a hot air gun I've had for many years. I got it for shrinking tubing used in electronics projects. It may be a bit hotter than the guns sold in craft shops. It will set paper on fire.
The gun is used several times in the process. At this step, you apply hot air to the back side of the artwork. It will first curl as the moisture in the paper is evaporated. Then it will uncurl and lay flat as it drys out. It takes about 45 seconds for this to occur with my gun running on low heat and held about a foot from the back of the paper. Make sure you work on a heat-resistant surface. You'll need to hold the graphic down so it doesn't blow away. I use the tip of screwdriver to press down on one corner.
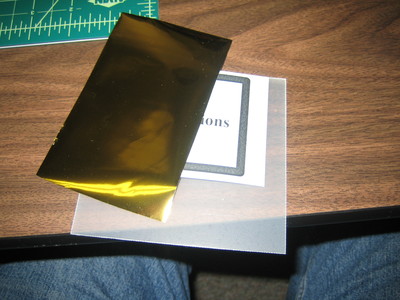
The artwork is placed at the top edge of the carrier. The foil sheet is longer than necessary to allow for wrapping around the top edge.
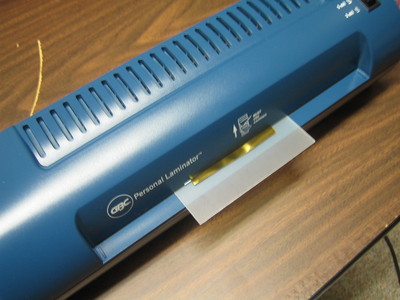
When the laminator grabs the carrier, it is important to use your fingers to hold back the gold foil, stretching it so it has to be pulled from under your fingers. This prevents wrinkles. There is a video on the Pulsar site that shows this very clearly.
Despite my best efforts, I slip up sometimes and let wrinkles in the foil get though the laminator. Because of this annoyance, I found an alternative method not shown in the photos. Cut the foil just a bit longer than the artwork and tape the top edge of the foil to the carrier with a strip of blue 3M tape. Don't let the gummed part of the tape hang over the edge of the carrier or it will gype up the hot rollers. Put the graphic under the foil, but not under the part that is covered by tape. With this method, I have not found it necessary to hold onto the foil at all. (At least with small work like book titles.)
In all operations where it is necessary to peel back a layer, it is best to roll off the top layer so it folds back 180 degrees. This minimizes forces that might rip the graphics off the substrate.
I've found the gold foil works perfectly and leaves no residue on the toner-free areas of the graphic. The Pulsar website states that it is often necessary to remove extra particles of foil. If you have extra foil to remove, apply the blue 3M tape in strips, covering the whole surface of the graphic. Rub down the tape and then peel it off. This will pull off the extra bits of foil.
Wipe both the mylar and the graphic with isopropanol. I use two cotton balls: one for the mylar and one for the graphic. Don't scrub around on the graphic: you will disolve and spread the transfer paper coating onto the gold, which is a Bad Thing. Just take a quick swipe in two or three bands across the surface of the paper.
Quickly dry off the paper using a wad of paper towel. Also wipe of the mylar. Some alcohol gets under the mylar, so be sure to dry both sides. Then give them both a shot with the hot air gun. Avoid touching the cleaned surfaces with your fingers.
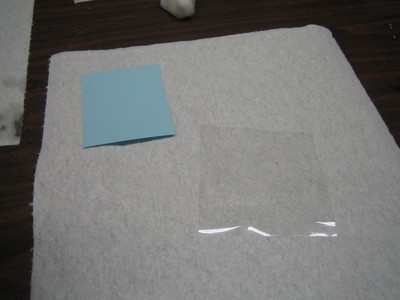
Put the graphic on the fiberglass carrier and cover with the sheet of mylar. Make sure the two clean surfaces face each other. I've botched several titles by getting confused about which side of the mylar was clean.
Now we use the sheet of baking parchment to cover the mylar. It has a tab folded over the top edge to keep it from getting pulled off in the laminator.
Put the assembly through the laminator twice in succession.
Things are delicate at this stage. Carefully remove the parchment and lift the graphic off the carrier so it will cool a few seconds.
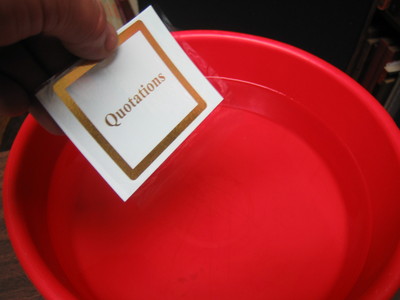
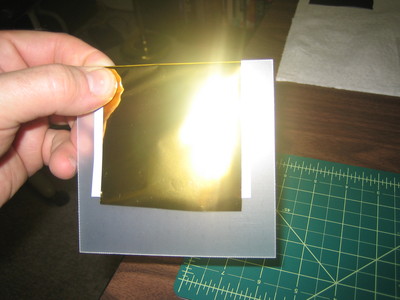
Push the mylar covered graphic down under water edge first. Do it quickly and let go at once. The paper will instantly curl into a tube and if your fingers are in the way, the mylar will likely separate too soon.
The Pulsar website recommends pushing the graphic into the water holding it so the paper rolls up toward your hand: The far edge rolls toward the edge you're holding. This will happen only if you hold onto the proper edge. Paper has a grain structure. Usually the transfer paper has a grain that runs the long way on a sheet. So if the image was printed in the regular portrait orientation, holding the paper by the side will work best.
In the photo, you will see that I'm holding the paper by the wrong edge. I've found that it doesn't make the slightest difference if you are quick to plunge the paper under water and let go quickly. Wicked people are always testing the boundaries.
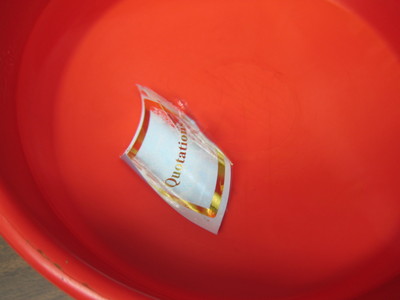
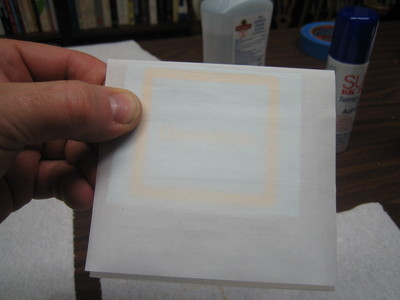
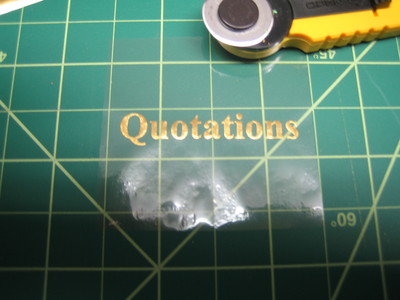
Here you can see the paper curl up into a tube. If you decide to use my home-made gel glue method instead of commercial transfer paper, the paper will curl more tightly and you'll have to wait longer for separation.
Now is the moment of reckoning: If you haven't been naughty for the previous day and if you followed the directions exactly, the mylar will float free with the letters attached.
You may notice that fragments of the border are broken off during the separation process. This is o.k.
You may wonder why we needed the border in the first place. To find out, try making a graphic without one: When you plunge the paper into the water, the letters will float away by themselves, unattached to the mylar. These be mysteries whereon but to think may snatch thee into peril...
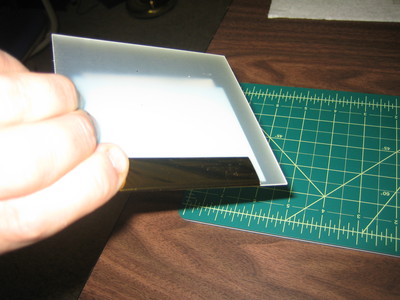
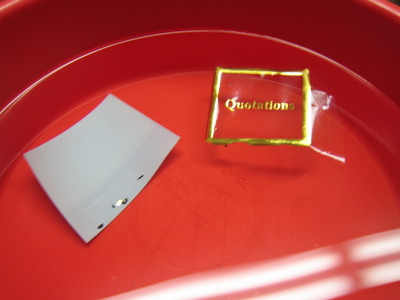
Grab the mylar by one edge and lay it flat on a paper towel. Lay another paper towel on top and blot.
Shift the mylar to a dry area and blot again.
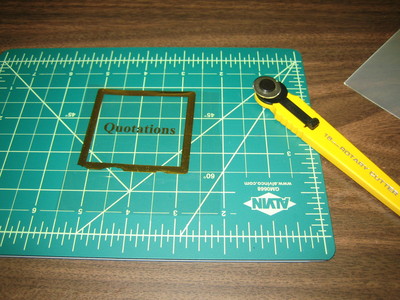
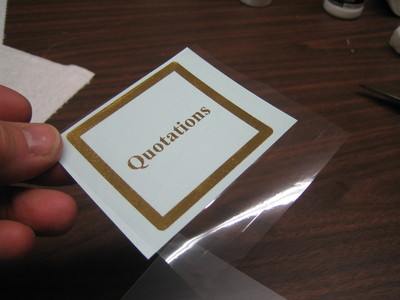
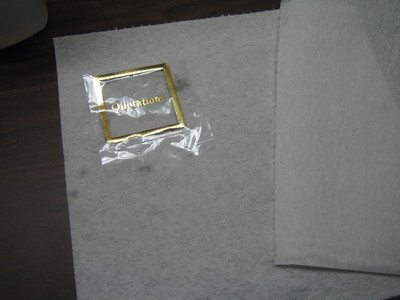
Now we are ready to cut off the sacrificial border.
I really like the roller trimmer for this step. You can buy these in sewing stores along with the special green cutting board shown. This cutting board has the property of "healing" when you roll over it with the cutter.
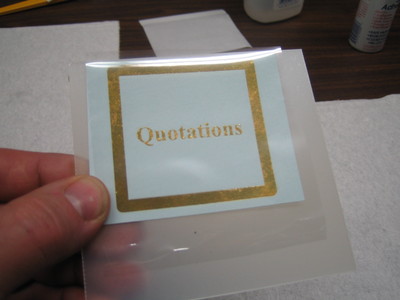
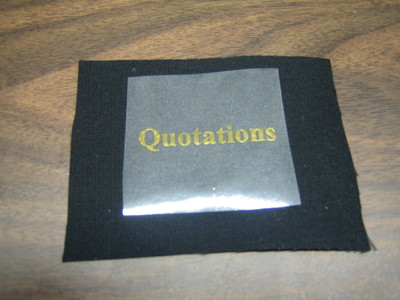
I call it a decal at this stage because it looks like one of the old water-slide decals that came with model airplanes. But this is a most unusual decal: When we apply it to the book, the backing can be removed.
The book cover was varnished and set aside to dry. At this point, you should blow some hot air on the cloth to make sure the varnish is totally dry.
Now you're ready to put the decal where you want the lettering to go on the varnished cloth. You can use a tiny bit of temporary adhesive on the corners to keep it from blowing away. The Pulsar kit comes with a spray can of this adhesive. I've also seen it sold in fabric stores. It doesn't take much to keep the decal from blowing away. We're not using the adhesive to attach the decal. I prefer not to use it at all because I don't like to clean up or breath the overspray.
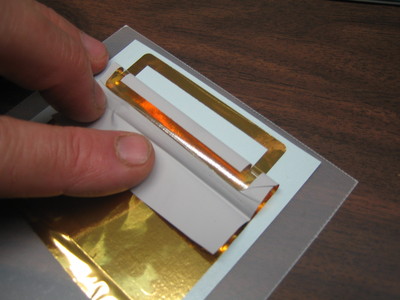
For this demonstration, I'm going to "iron on" the decal using the laminator. The cloth is on the fiberglass carrier with the decal held in place by the parchment cover.
T-Shirt makers also use the toner transfer process and a special hot iron that applies a controled amount of high pressure. I've tried doing this process with a regular clothes iron and the results were not satisfactory. It would be nice if a hand-held iron could work because then you could apply lettering to a finished book.
Since I like to make small books, I can process the whole cover with a small laminator. For larger books, you can buy a bigger laminator or master the iron-on method.
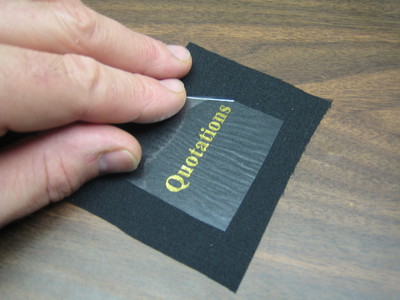
The letters are not firmly attached at this point. You have to be careful and use the 180 degree rollback method. Go slowly and you will get good results.
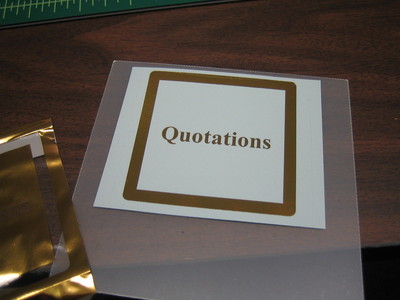
Here is the title on the cloth. Don't rough up the cloth or bend it at this point.
Now I run the cloth through the laminator again, covering the letters with parchment. I usually make two passes.
If you're using a clothes iron, you can go ahead and use more heat. My iron has a scorch guard light that comes on when the cloth is too hot. I use this to tell me when to stop ironing.
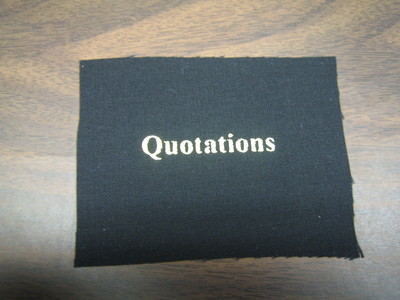
The letters are stuck on pretty well at this point. If you are using very smooth cloth, you might get away with nothing more. On coarse bookcloth, I found that the letters would brush off unless I used some kind of coating such as varnish or artists' fixative.
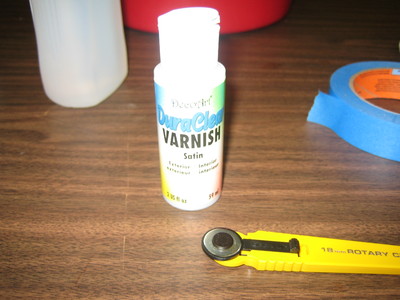
I use a water-based flexible polyurathane cut 50% with water.
This varnish is actually good for the cover, it prevents stains and water damage.
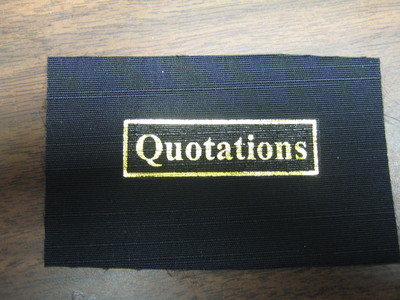
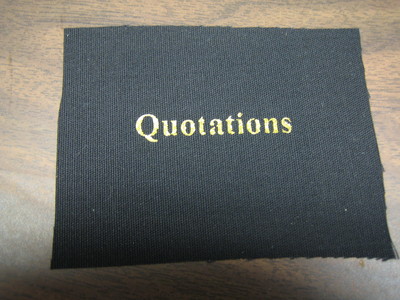
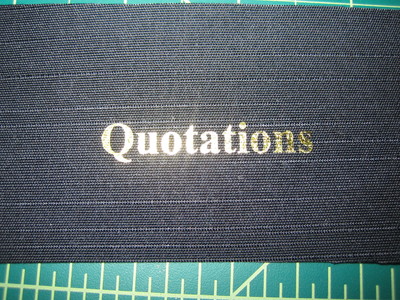
Here is an up close view. The lighting isn't perfect, but the title is flawless. This one has two coats of the 50% varnish. It won't come off when scrubbed with a toothbrush.
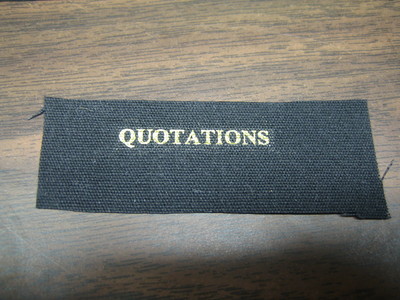
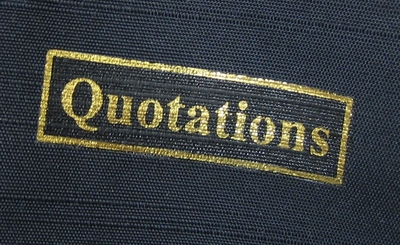
Here's a sample done with a 14 point font. This is for a title on the edge of a miniature book. In this example, I used a variation of the technique described above: After varnishing and drying, I laid on another identical mylar decal and ran it though the laminator. This decal adhered strongly because it was attached to the smooth surface created by the first decal and the varnish. The lettering is especially bright and robust. You can speed this process by printing a duplicate title on the original graphic.
In this example, there is no varnish on the letters applied by the second decal. The lettering look brigher this way. I also tested it with a brush and nothing came off. This is now my preferred way to apply gold titles, so I always make the decals in pairs.
Here's a book cover with the spine and front lettering:
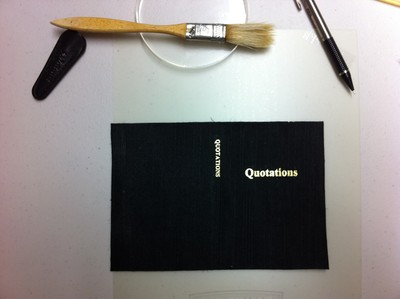
Because the cover title is exposed to constant wear when the book is shelved, you should indent the lettering so it doesn't rub. This problem doesn't arrise with traditional hot stamping because each letter is embossed.
Cut a small rectangle of cardboard to cover the title area or, if it has a border, the whole area including the border. Put the cover (attached to the boards) in the nipping press between two hardwood blocks and press as tightly as possible. The rectangle of cardboard will be stamped down into the cover board, making an indentation in the cloth. The letters are now sunk below the surface and will not be scraped by adjacent books.
An even deeper embossing can be achieved by laminating the book board with a thinner sheet of cardboard with a rectangular cutout where the title will be embossed. I prefer this method but more steps are required: You must laminate another sheet of the same cardboard to the back of the bookboard as well. Otherwise the board will be warped by the front layer. To make the back and front boards the same thickness, you'll need to treat both sides of the back board the same way.
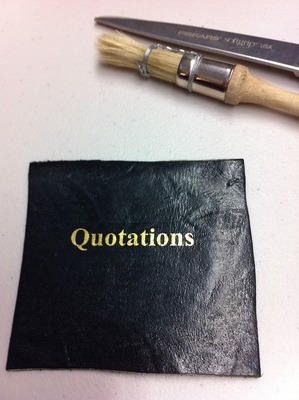
In the example shown at the top of this page, I used a scrap of kangaroo hide. I first applied a thin coat of water-based polyurethane varnish which I force-dried with the hot air gun. Then I put on the title as described above. I used the hot roll laminator and it was just barely possible to force the leather through the rolls. I had to help it along by pulling from the back side of the machine. This piece of leather was about 1/16" thick (4 oz as they say in the leather business) and I don't think I could use anything thicker in the laminator.
It is important to make the mylar sheet cover the whole surface when transfering the lettering. Otherwise the leather gets polished under the mylar area and the effect is hard to remove. I think the hot laminator softens the polyurethane under the mylar and smooths it out giving a more polished look. This might be an attractive effect confined inside a decorative border.
I applied another coat of polyurethane over the entire piece of leather. The letters are very durable and pass my informal "toothbrush test" better than lettering applied to cloth. Still, it would probably be best to emboss the title area on the cover.
Problem:
After the gold foil is pealed off the lettering
on the transfer paper, there are little gold specs
everywhere.
Solution:
A few specs can be picked off using strips of blue
3M painters tape. It won't pull the gold off the lettering.
If you have lots of gold specs, it's usually because the
paper wasn't sufficiently dried with the hot air gun.
Problem:
The letters float away in fragments when the mylar
separates in the bowl of water.
Solution:
It is important to clean the border as well as the
graphic with alcohol. The mylar must also be cleaned
with alcohol and not accidentally assembled with the
unclean surface against the graphic. The clean paper
and mylar surfaces must be dried with the hot air
gun. Wet spots will cause separation.
Problem:
The mylar separates in the water, but the gold
lettering remains on the paper.
Solution:
You have to use the right kind of laser printer.
Most work but some do not. The Pulsar site has
a
page
devoted to selecting the right kind.
Hot stamping with real gold leaf and egg wash is a time honored technique. This process is unproven to say the least and may simply fail due to unforseen chemical effects after a few years of handling. I hope to conduct some durability experiments comparing these letters to those produced by hot foil stamping with synthetic gold foil and real gold when time permits.
If you decide to try these methods, please let me know how it works out!
Back: Finishing