Movement in clock
Hugh Sparks
June 29, 2005
http://www.csparks.com
Template grinding is a technique for fabricating the "flat work" parts of watches and clocks. The method was popularized by William O. Smith in his book "Twenty First Century Watchmaking", where he presents the method in exhaustive, meticulous, painstaking, and repetitive detail. This article is simply a brief photographic overview. Readers of normal intellegence can work out numerous refinements.
The idea is to mark out a pattern on a strip of sheet metal and then grind to the outline using a slotted saw table and small abrasive wheel driven by the watchmaker's lathe. With appropriate magnification, amazingly complex parts can be rapidly fabricated.
Materials
Pre-hardened shim stock is ideal for this purpose. It can be obtained in precision ground thickness. The metal is usually somewhat harder than spring-hard, but this is often ideal for watch parts. Because the process forms the outline by grinding, there is no need for heat treatment before or after cutting.
Templates
The key difficulty is getting a legible outline on the shim stock. W. O. Smith suggests coating the polished stock with beeswax, laying the original part on top and heating from below in a blueing pan until the metal discolors. I've tried this method several times and only succeeded in setting myself on fire.
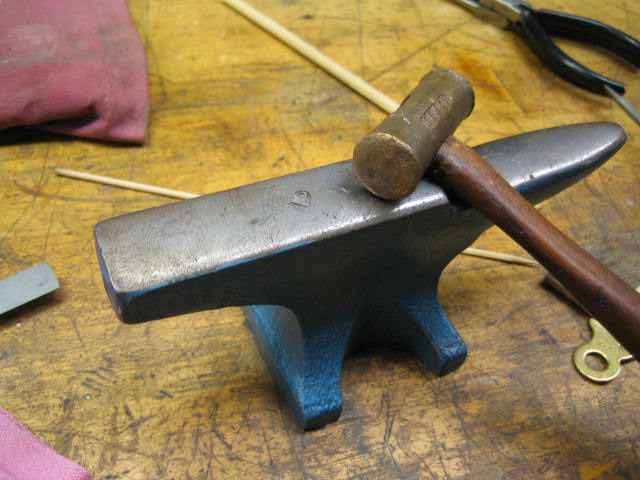
Smith also suggests soft-soldering the original part to the flat stock. This method works very well, but in the example I present here, the orignal part was not flat until I beat on it with a big hammer. Then it was broken into so many pieces that I had to make a new template from scratch.
I've also tried making high-resolution prints on paper with the computer and glueing the pattern to the stock. This sort-of works, but the paper and glue build up residue during grinding that makes the outline hard to see.
Using silk screen photo-emulsion might give excellent results. In that case, you would laser print the part in black on acetate and then burn the outline on the emulsion-coated shim stock. I haven't tried this method, but it sounds good, doesn't it?
For the example presented here, I used a brass template. Although this method takes a bit longer, it makes a clear and stable outline to follow.
Tools
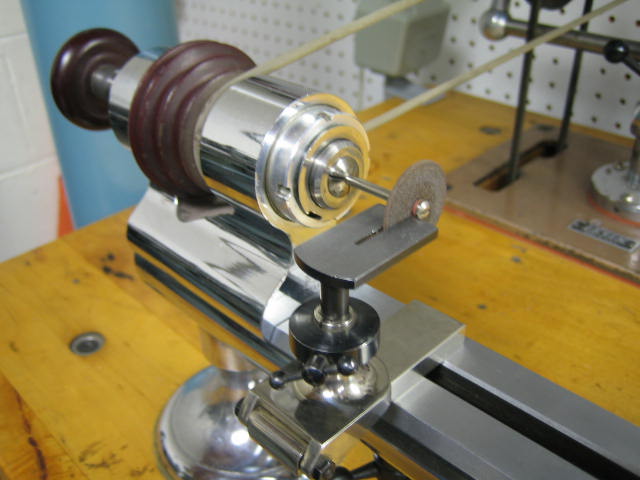
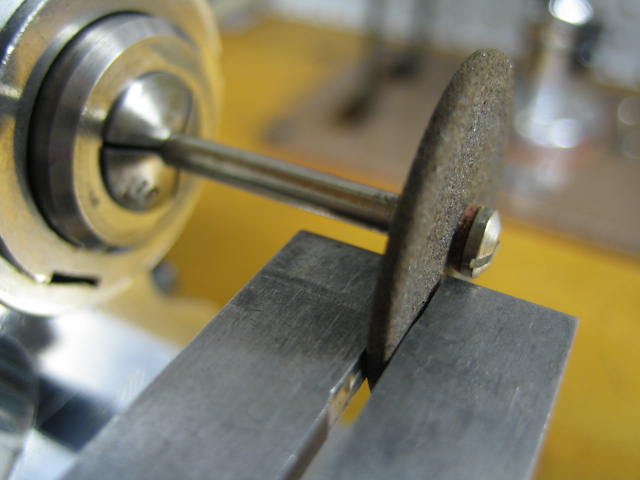
I use inexpensive Dremel-tool arbors and small grinding disks. For very fine work, wheels called "separating disks" can be obtained in very small widths. I have some disks that are 0.004 inches wide. In general, it is a good idea to use the widest wheel suited to the part to avoid rapid wear and breakage.
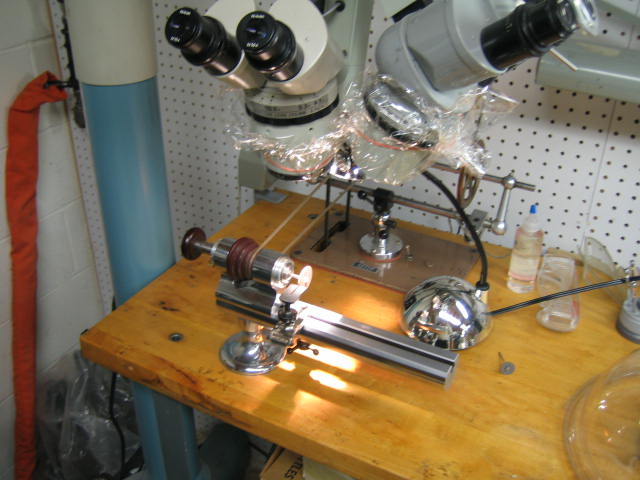
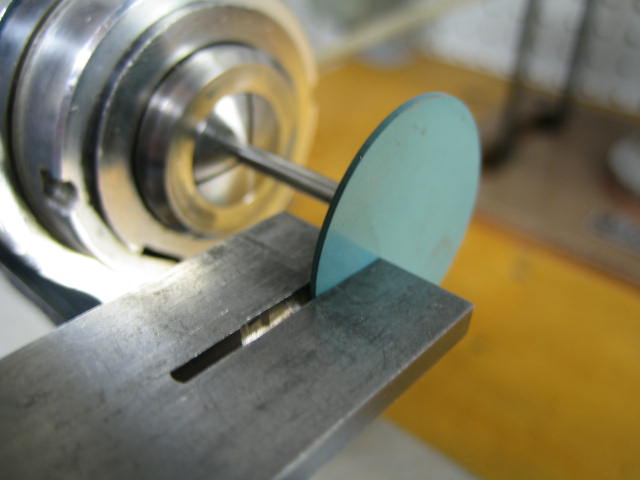
The wheel is driven in the watchmaker's lathe at fairly high speed. The part and template are supported on a saw table. The table should be precisely on-center and the slot should closely fit the wheel. For fine work, I attach a fresh sheet metal plate to the saw table and saw a new slot using the wheel.
For finishing, a set of molded-abrasive wheels work well. Cratex is one brand that comes in a nice set with the necessary arbors.
Hole location
Frequently, flat parts have multiple holes that must be precisely located. When making a replacement part, the orginal part may be clamped to the shim stock to use as a drilling template.
I use a refinement with this technique that gives very precise center locations. First, I clamp or solder the original part to the stock. For each hole, I turn up a simple steel transfer punch: The outer diameter of the punch just fits the hole in the orignal part. At the center of the punch, I form a very short point. Because the punch fills the hole, the center is very accurately marked. Spoting with a micro-sized center drill keeps the twist drill from wandering. I usually drill the hole under size and broach to the final diameter.
So far, I've always been able to drill feeler gage stock using ordinary high-speed steel twist drills. For an application where a very hard part is required, carbide circuit board drills will cut through nearly anything if you can avoid breaking them.
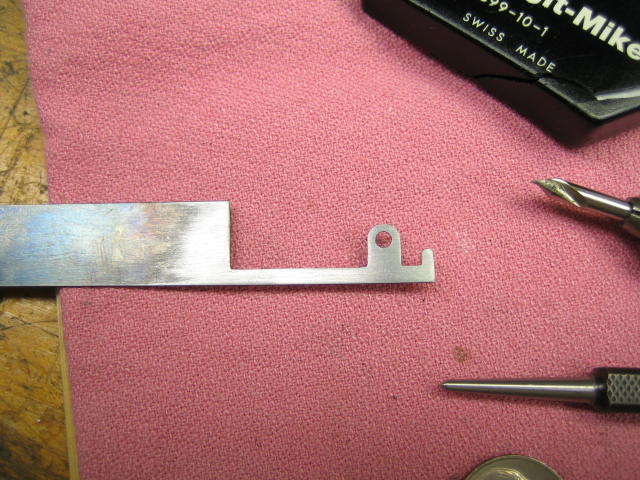
Using a brass template
I clamp the broken original part to a thin sheet of brass shim stock. This can be roughed out with scissors and then rapidly filed to the final outline.
I use an optical comparator to examine the template and compare it to the original part. The template can also be measured with the micrometer and touched up with fine escapement files.
When the template is finished, I attach it to the shim stock with soft solder. Holes are then located and finished as described above. Finally, the outline is ground on the lathe using a stereo microscope.
I've been using this method with great success since Smith's book came out in 1996. The example presented here is a comparatively simple part that came in for repair when I happened to be in the mood to write up this page.
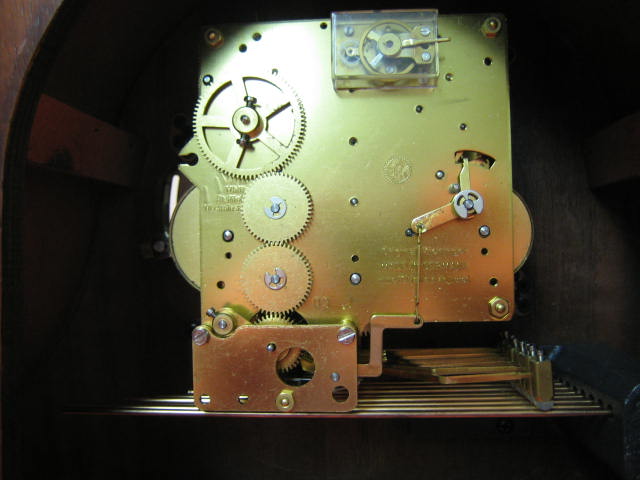
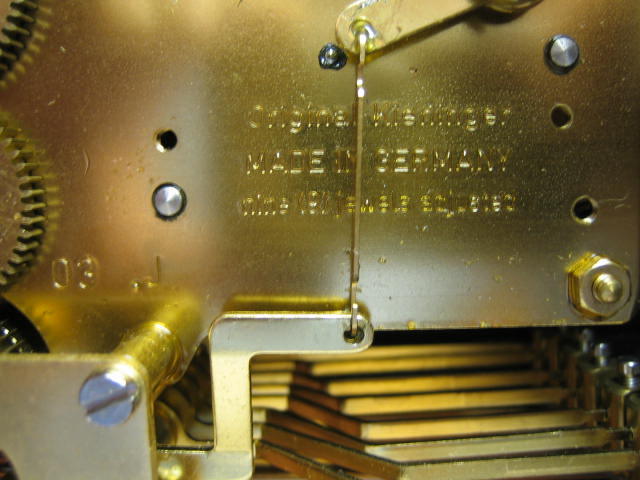
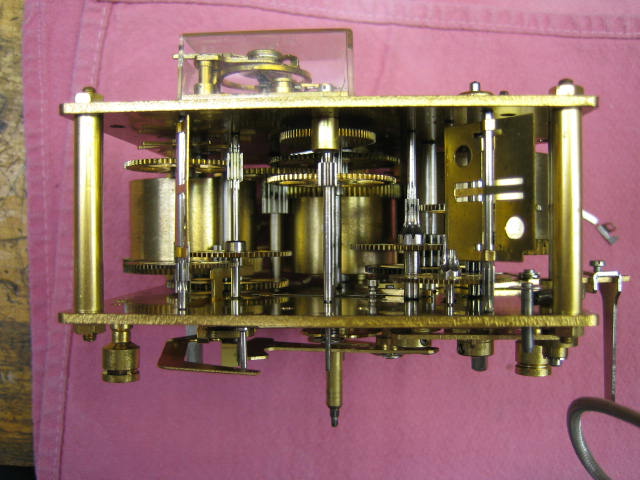
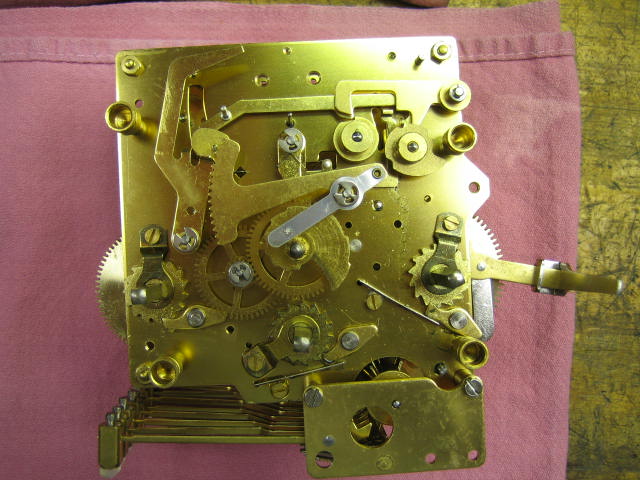
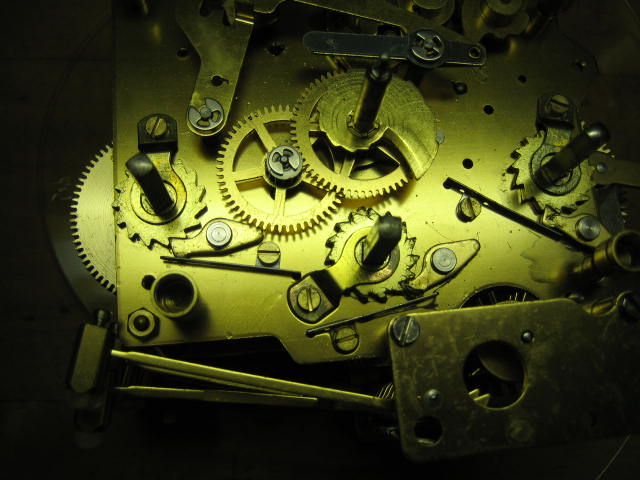
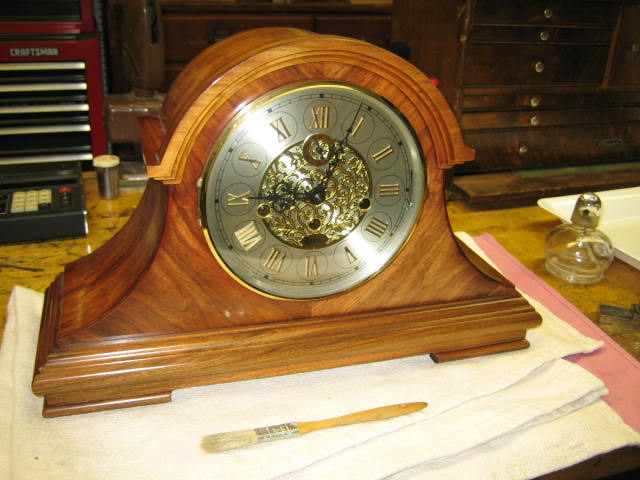
This clock belongs to a friend who generously broke one of the rachet springs so I could write this article. It has a nice Kieninger "J" movement.
A few shots of the clock
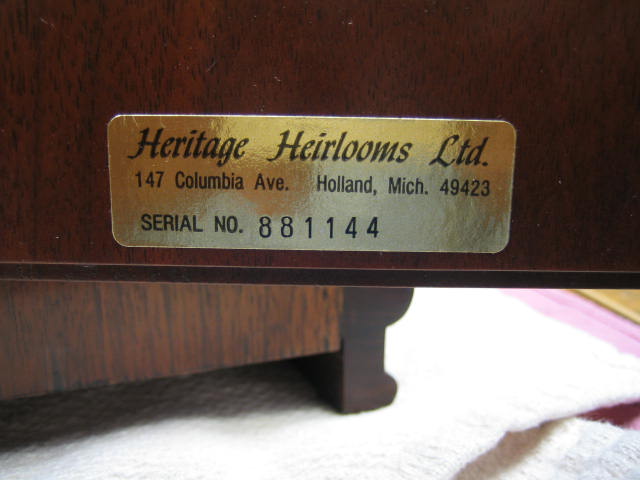
I see this clock rather frequently, so I'm including some references for ordering parts in the future.
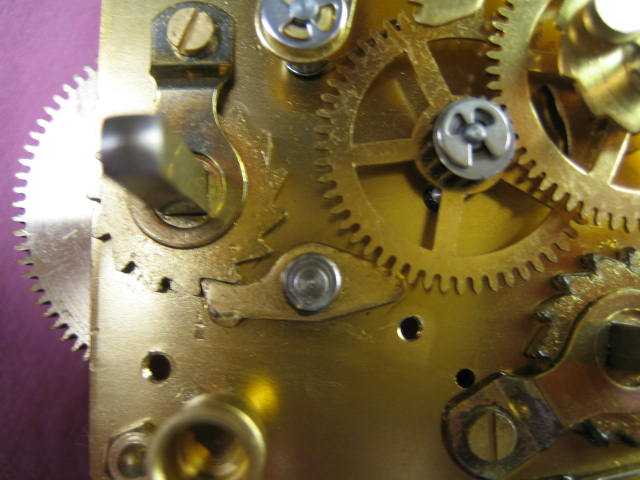
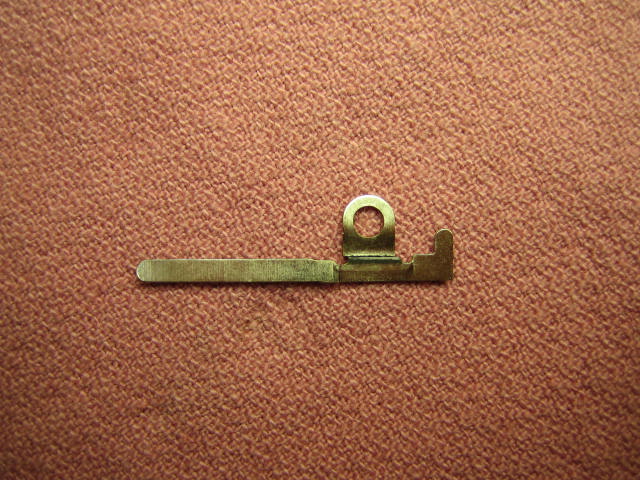
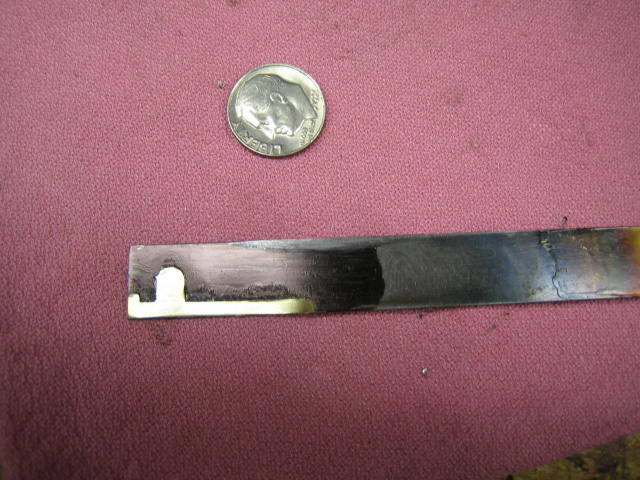
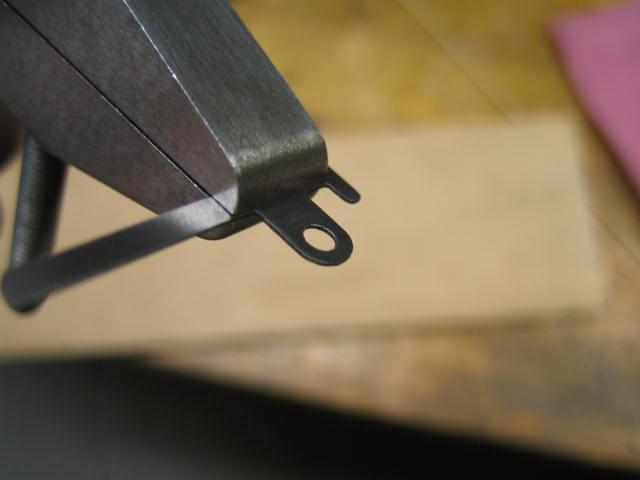
The broken spring
This clock has three barrels: time, chime, and striking. The broken spring hold the rachet pawl on the left most side of the photo below.
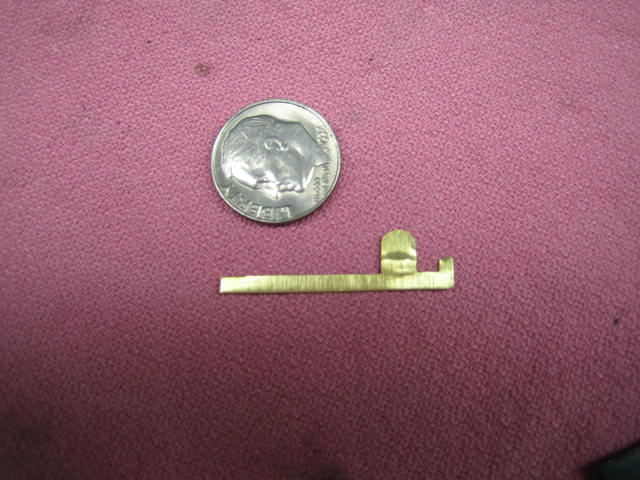
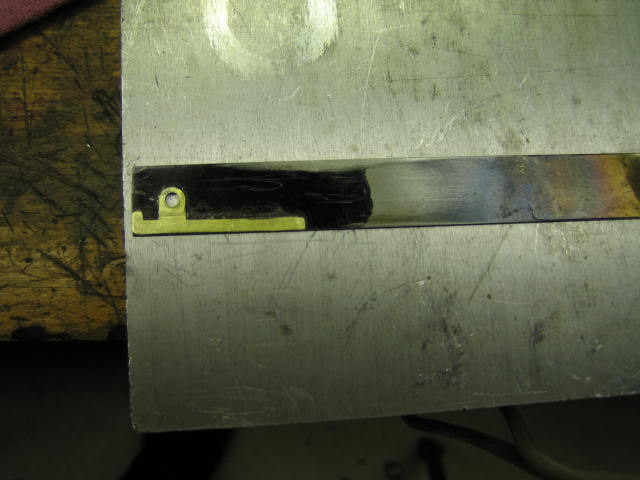
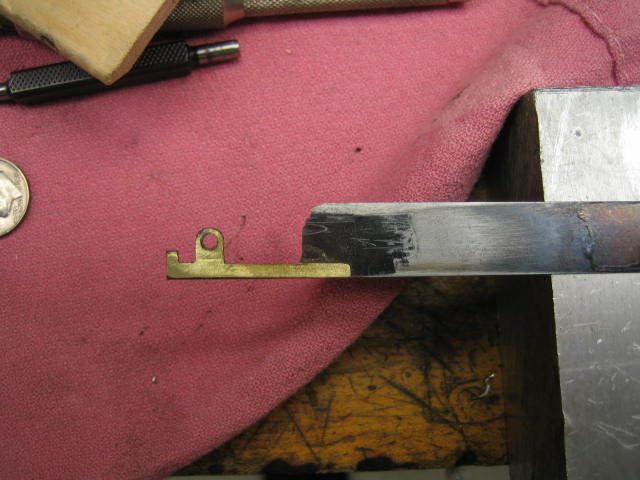
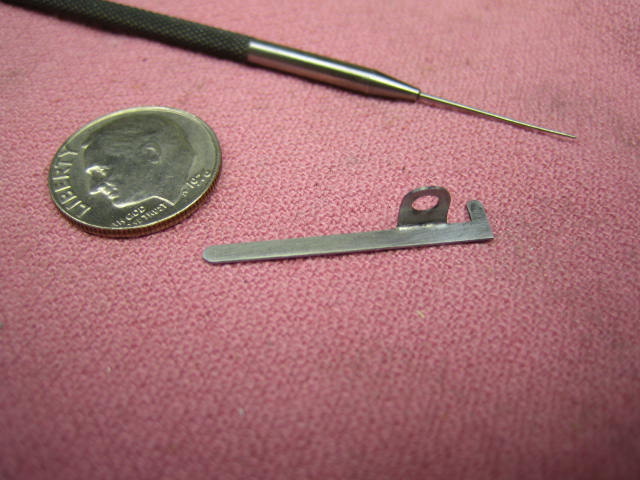
Making the brass template
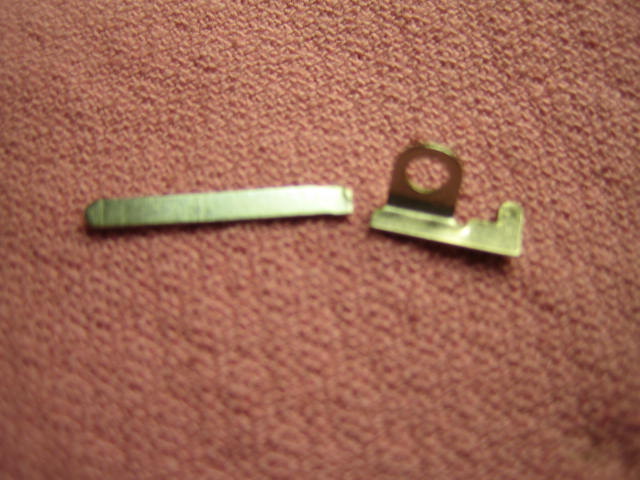
I had to flatten out the original part to make an outline for the template. In the process, I broke it again so now there are three pieces.


Preparing the stock
I don't remember where I got this box of stock. It is very hard stuff I discovered later to my dismay.

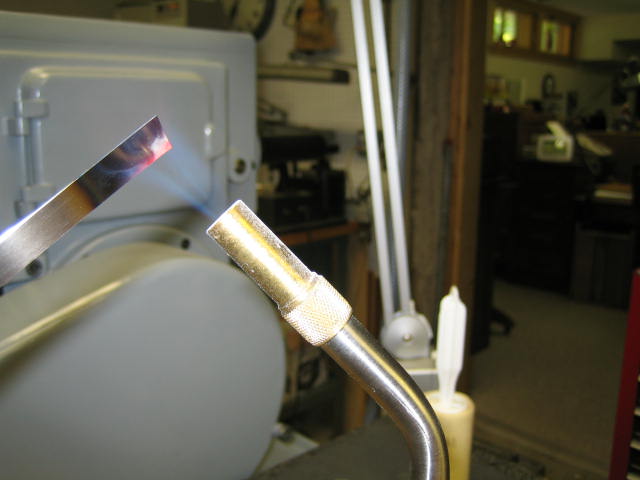
To solder the parts and keep them precisely aligned with the reference edge, I tin both surfaces and wipe them to get a very thin solder layer on both. Then I clamp the parts with bent wire springs and heat them together.
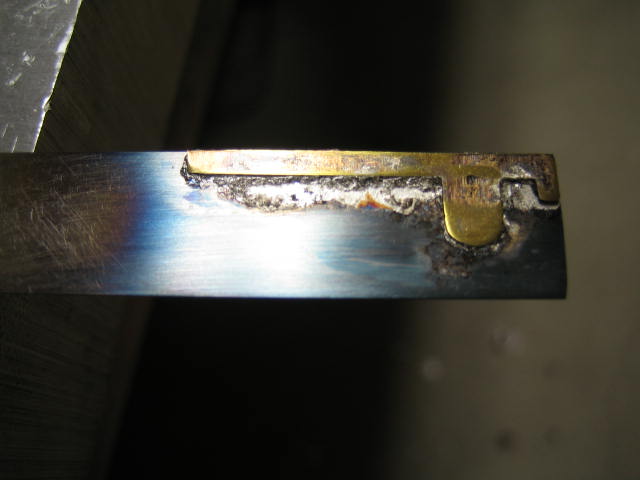
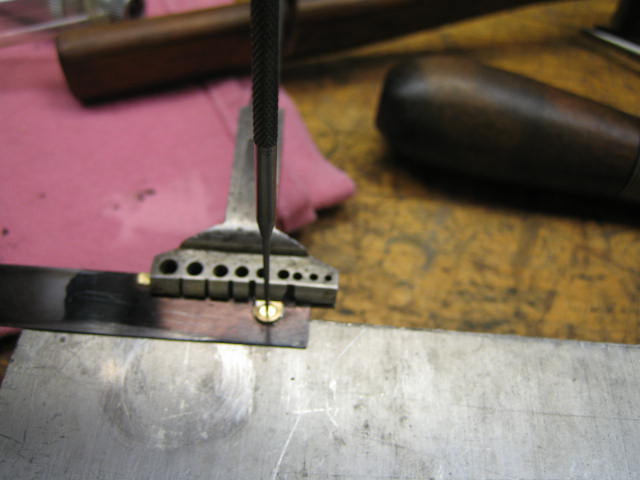
Locating and drilling the hole
This was not a super precision part, so I decided to skip the punch fabrication. I wish I hadn't because I spent about 15 minutes "walking" a center punch mark around until I got it centered.
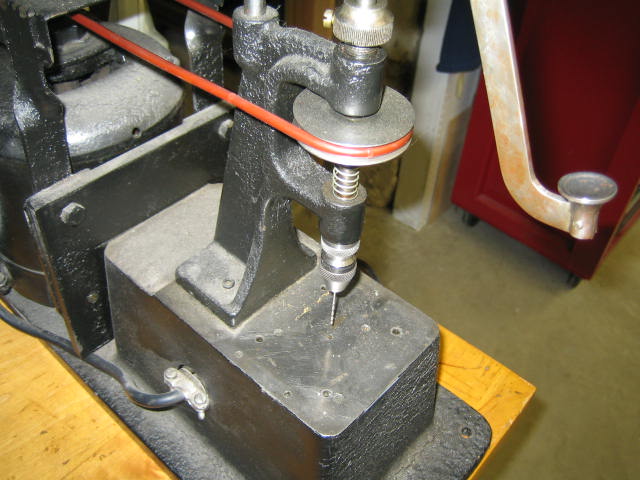
Grinding the profile
The subtitle of W.O. Smith's book is "The Joy of Making Parts with Ease." At least in my opinion, he's got that right. Once the template or outline is attached to the stock, the grinding and finishing process is easy.
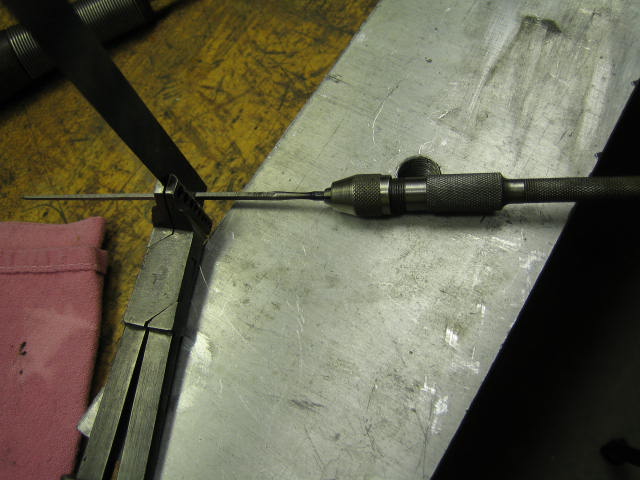
A key is being able to see what you're doing. The 3D microscope and fiber illuminator make this process quick and fun.
The lathe and microscope must be protected from the fine grinding dust. I put plastic kitchen wrap over the microscope objectives held in place with rubber bands. I do the same thing with the lathe headstock, leaving just a punched-through hole for the grinding arbor.(Not shown for clarity.)
I wanted to get some photos of the outline-following process thorugh the lens. But I also wanted to finish the project in this lifetime. I don't have proper camera mounts to do this easily. So I didn't.
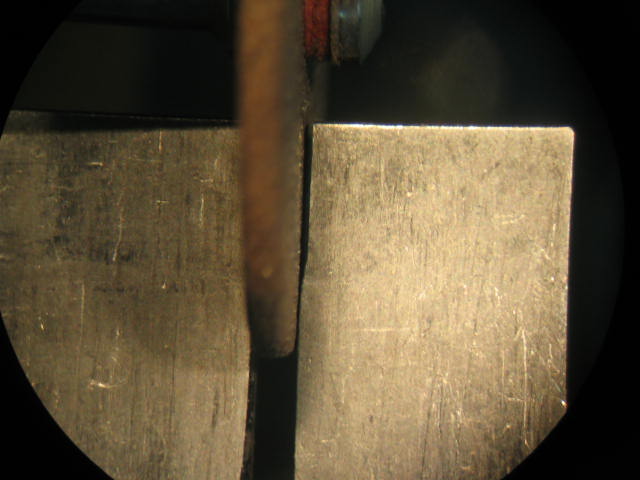
I don't bother to dress the wheel square until the outline is nearly complete. Then I make a pass with the diamond dresser to square off the edge so I can clean up all the square corners.
The last step before parting off the finished piece is smoothing the edges with a Cratex wheel. A wider wheel would have been better for this part.
Finishing
This is the second try for this part. The first time, I broke off the tab with the hole when I tried to bend the right angle. I thought I'd annealed the shim stock. For the second try, I heated the part and the tongs, bending about 20 degrees per heat.

Assembling

"There is scarcely anything in the world that some man cannot make a little
worse, and sell a little more cheaply. The person who buys on price alone
is this man's lawful prey."
-- John Ruskin
William O. Smith, Twenty-First Century Watchmaking, American Watchmakers Institute Press, 1996.
Mr. Smith is prolific author of technical watch and clock books. His unique style of writing occasionally prompts me to attempts at humor which I sincerely hope he finds inoffensive.