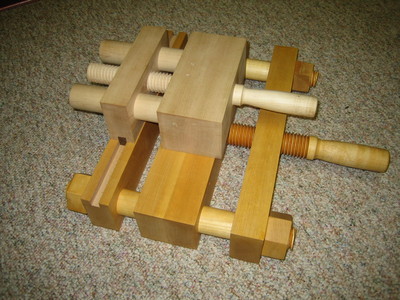
The laying press
I've been using a Jorgensen woodworking clamp as a laying press for about 2 years. I position it so it hangs over the edge of my bench and use another clamp to hold it in position. Trimming is done with a wood chisel. This setup is tedious and I wanted to make larger books, so I finally decided to spend a weekend making a small laying press.
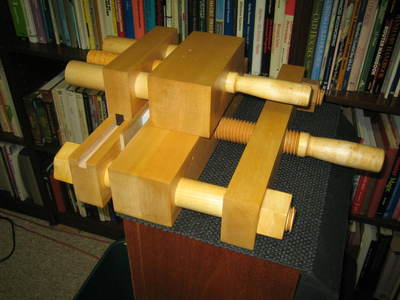
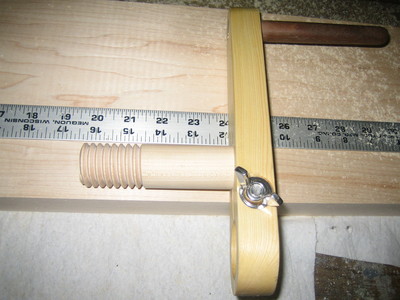
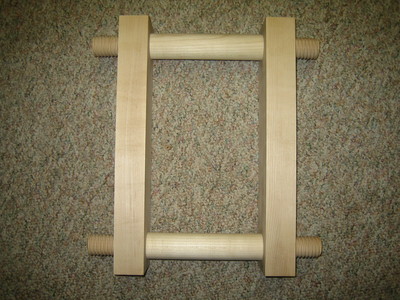
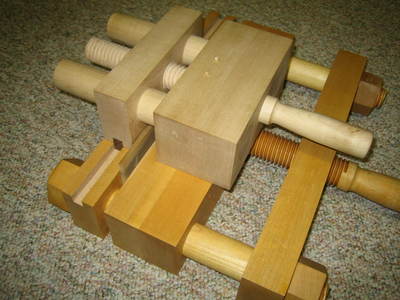
Most of the commercially available models cost hundreds of dollars and usually have a clamping screw at each end. This works great if you're an alien with three arms. Otherwise, I prefer the French style press that has a single screw and two guide rods. This allows you to position the book with one hand and tighten the press with the other.
Originally, I just wanted to make a press as quickly as possible. Something simple in keeping with the spirit of the rest of my bookbinding site.
I planed to use 2 pieces of 2x4 pine, two lengths of iron pipe for the guide rods and a steel veneer press screw. The frame was to be assembled with threaded rods and washers.
I actually went to the hardware store and bought all this stuff, but I put off starting the project. I kept looking at Thomas Duffy's beautiful press and wondering what it would take to make a smaller version.
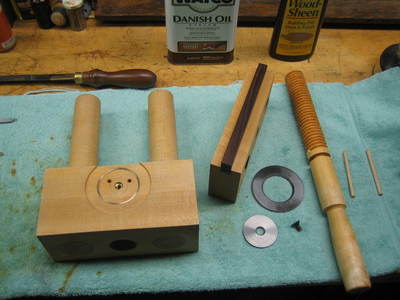
After much agonizing, I decided to make a more elaborate press entirely from wood. I bought one length of maple 2x4 and two maple dowels. The total cost was about $30.00.
I used some exotic tools to make this press. I wish I could find a way to do it without all this stuff. Unfortunately, I know more about metalworking than woodworking and I wasn't in the mood to experiment. "To the man who's only tool is a hammer, every problem looks like a nail."
I have one of those nifty Beall wood threaders. This is an unusual tool, but it works very well. If you want to do this on the cheap or if you don't own a router, you could try the Highland Woodworking wood threader. Follow the link and then use their search box with the key "Manual wood threader."
The Beall company also sells precision dowels and I recommend them highly. The only alternative would be to make your own. Hardware store dowels are seldom round and seem to have random diameters.
The other tools are found in most wood shops, with the exception of the milling machine. I used the mill so the guide rods would be positioned accurately and absolutely parallel.
I think you could successfully build this press without machine tools, but you'd need some sort of drilling jig to position the holes accurately. A good drill press could probably drill parallel holes with a Forstner bit. To avoid using a boring head, you'd have to make or buy dowels the right diameter to be a close sliding fit in holes made with standard Forstner bits. Here is a simple dowel making jig at Highland Woodworking.
If you make this press and get good results without all the fuss I show here, please let me know and I'll write up your method instead.
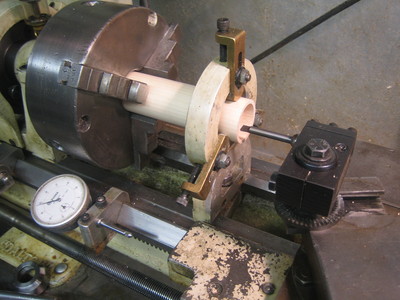
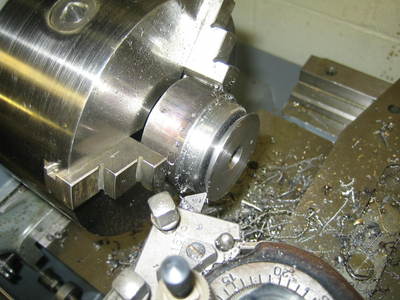
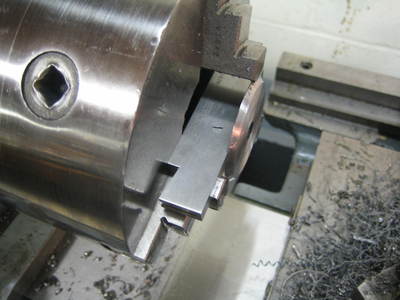
I cross cut 4 identical pieces of maple. These were squared up and made parallel with the jointer and planer. The next problem was to drill the holes for the guide rods in exactly the same place.
It's hard to mark on wood with high accuracy. And the distance between the holes was larger than the table travel of my milling machine. So I had to layout the holes with a height gage and scriber. To make clean lines, I taped scraps of brass shim stock to each end of the boards. With a board laying on its long side, I scribed a line to mark the center line at both ends. Then I turned the board on end and marked the vertical offset of one hole from the end. Using the same orientation, I offset the height gage and scribed the line for the other hole. The distance between the holes is now fixed with the accuracy of the height gage, which is probably better than +-0.0005".
I clamped each board to the mill on parallels and found the crossed lines using the centering microscope.
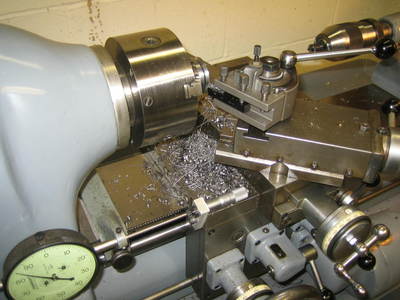
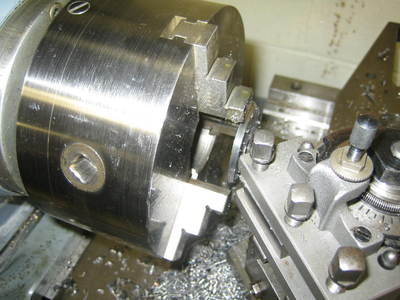
Next, I step drilled the hole out to 1/2" and then switched to the boring head.
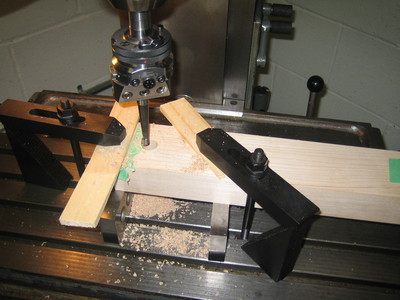
The boring head ensures that the holes are round and have parallel sides. It is also finely adjustable so the holes will be a close sliding fit for the dowels.
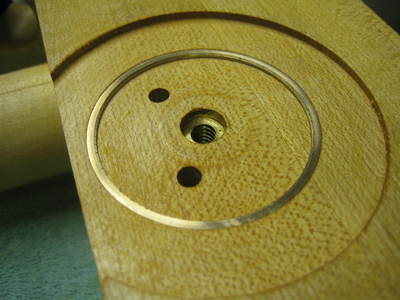
The holes for the outer ends are bored for threaded fasteners. The holes for the platen are bored larger to fit the guide rods.
It would have been a lot easier if I could have stacked two boards face to face. Then I could have bored the holes two at a time. But I didn't have a boring bar long enough to pass through two at once.
If you have a Bridgeport or some other full sized mill, this whole process would be very easy: You could bore two at a time and simply crank in the distance between the holes. I was constrained by the small size of my my machine.
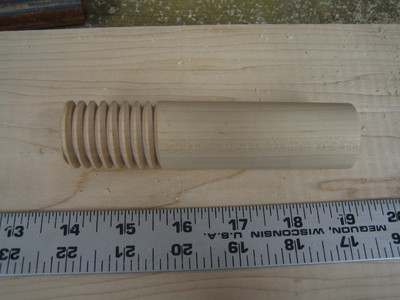
This step was difficult because the Beall wood threader can't cut threads up to a shoulder. In fact, it requires that a full two inches remain unthreaded inside the plastic guide bushing. Because of this, I couldn't simply thread the ends of the guide rods because the shoulder on the rod needed to be closer to the threads. To deal with this, I had to make short plugs with threaded ends and glue them into the guide rods. Using thicker boards would eliminate this complexity.
It's nice to have a "grinding lathe" for woodworking. I'd sure hate to do this with the Hardinge.

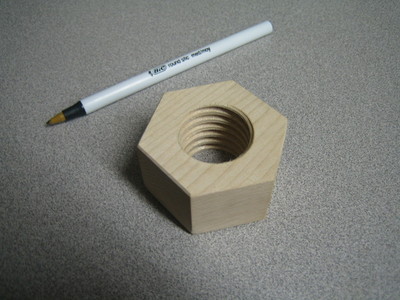
The wooden nuts are easy to make. The Beall kit comes with a plastic template for drawing all sizes. I drew 4 outlines using the template and bored the holes with a Forstner bit. Then I bandsawed around the outline and finished the sides on a belt sander.
You may ask yourself, "Self, why did he bother with those nuts? Why not just glue the press together?" I made the press so it could be taken apart because, to my eye, it looks neat.
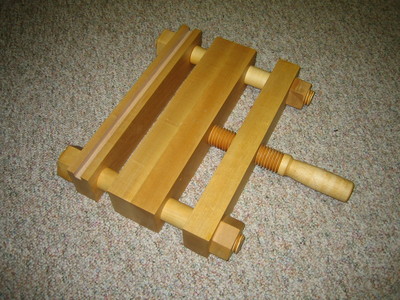
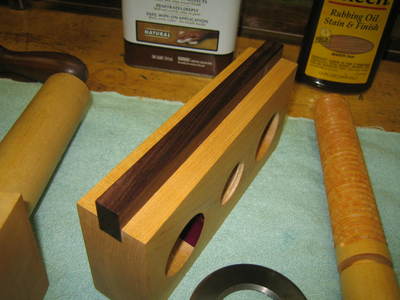
The platen was made by gluing two boards face to face. I made it double thickness so it wouldn't bind when sliding on the guide rods. A double thickness also distributes the force from the press screw more evenly.
I put in the guide rods to align the holes and then installed two temporary wood screws near each end.. After removed the guide rods and the screws, I glued the boards together and reinstalled the screws along with several iron clamps. Using alaphatic glue, clamping time was about an hour. It's best to remove the clamps ASAP so you can scrape off the excess glue before it gets rock hard.
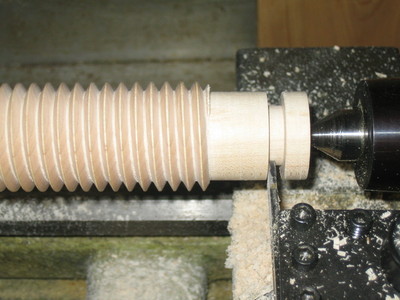
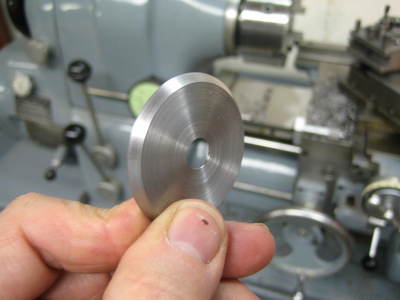
The press screw was made by threading a 1.5" dowel. One one end, the threads are turned off, leaving about 1.25" of smooth shaft.
One end of the press frame is bored and tapped in the center to fit the screw. One end of the platen is bored to make a close fit for the turned-down end of the screw.
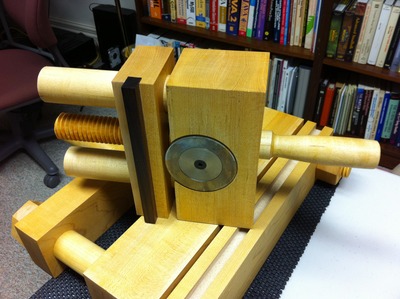
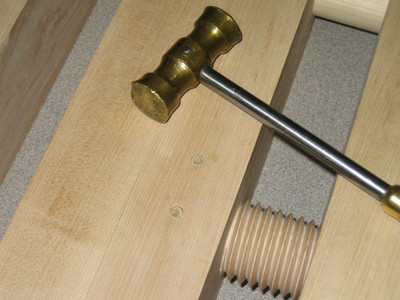
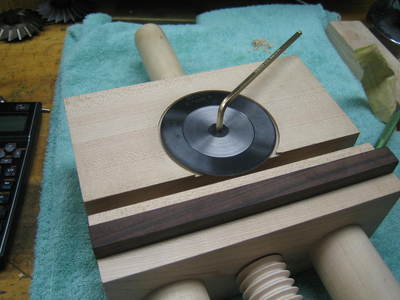
The screw is retained inside the platen by two 1/4" dowels that pass completely through the platen. These dowels also pass through a groove cut into the press screw. The dowels are a press fit in their holes.

There is a tricky detail here: The groove in the screw and the holes in the platen must be positioned so the end of the screw will press on the bottom of the hole when tightening the press, rather than on the dowels. To get this right, I first turned down the end of the screw to fit the hole in the platen. Then I drilled the dowel holes so they would intersect the edges of the screw. This marked the screw with two round cavities. I put the screw in the lathe and turned the groove to remove these cavities and then extended the groove a little bit away from the pushing end.
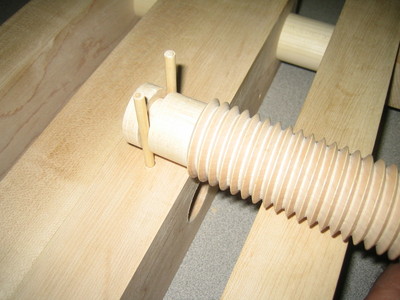
After the screw is installed, the two 1/4" dowels are driven into the platen to retain the end of the screw. In the photo, I've used the brass hammer to apply dirt™ so you can clearly see the placement.
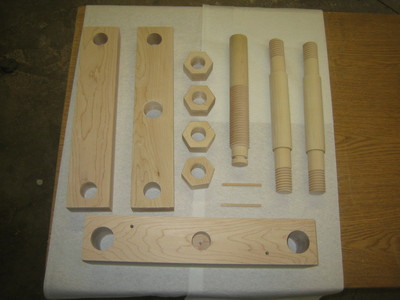
Tighten the nuts to hold the ends in place and the press is finished.
Midway though the project, I also located Timothy Moore's bookbinding tools. He has such a great idea for eliminating the round guide rods that I'm totally disgusted that I didn't think of it first. His tools are both beautiful and reasonably priced. I expect he can make them without machine tools. (And so could you.)
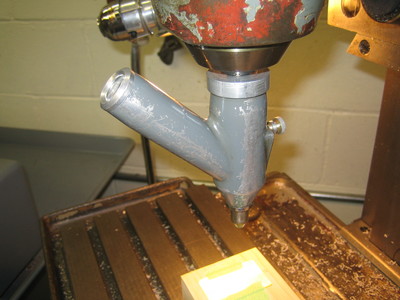
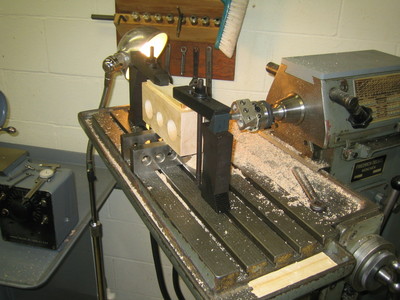
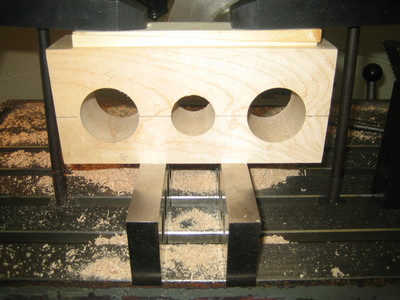
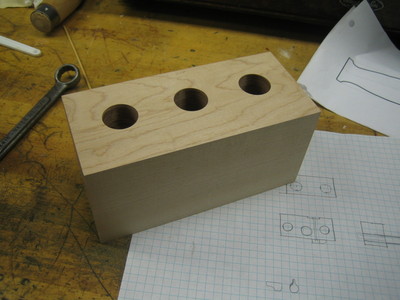
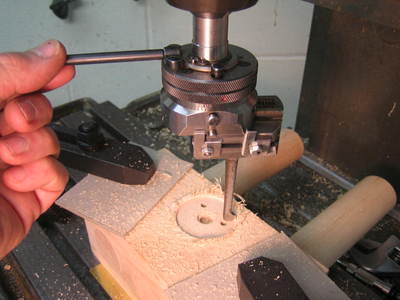
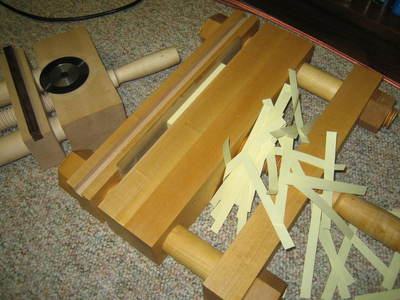
This is the paper trimming plane that goes with the laying press. It was much easier to make because the holes were in the travel range of my little mill. There was no need to fuss around with optics. I did a rough layout with a ruler and pencil. Next, I drilled the holes undersize with a big Forstner bit. Finally, I used the mill in horizontal mode with a boring head to finish.
I just read about this nifty plough made with a circular blade. It seemed like a good idea, so I started looking for a suitable blade.
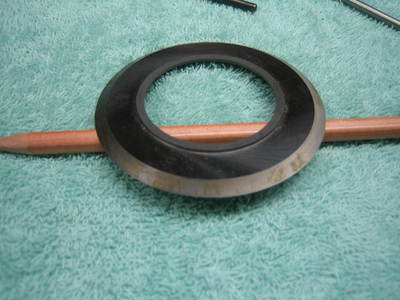
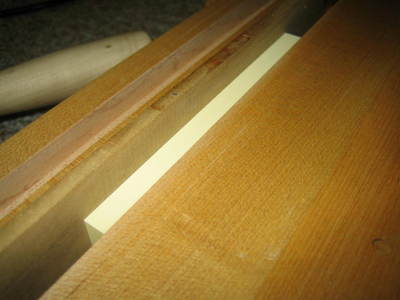
Unlike the design described above, I decided not to have the blade rub directly on the press rail. Instead, I created an inset to exactly align the blade with the bottom surface of the plough. This keeps the press rail from getting scratched up.
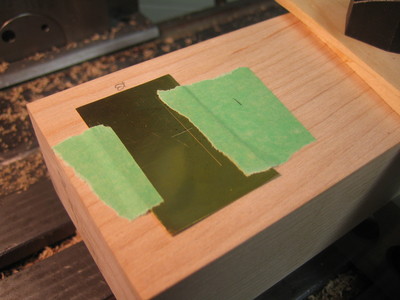
Rumaging around my favorite industrial liquidator, I found this nifty solid carbide circular blade:
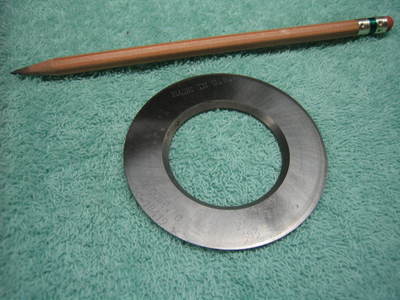
It was made by Q-Corp for trimming the leads that stick out the back of printed circuit boards after the components are placed. Sort of like a carbide lawn mower. New blades are expensive, but used ones come up on eBay from time to time and you can have them resharpened for $15.00 at Q-Corp. After reading about what's involved in making and sharpening these blades, I get the feeling that this blade will last me a lifetime without resharpening.
Update: After a year of use in trimming books as well as grey board, I still haven't found it necessary to rotate the blade! This carbide stuff is really great for bookbinding.
Mounting the blade on the plough:


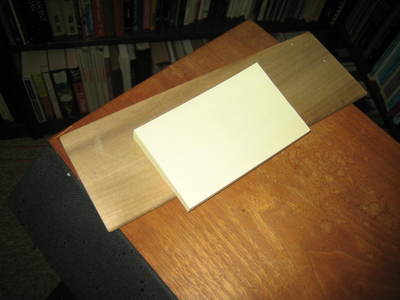
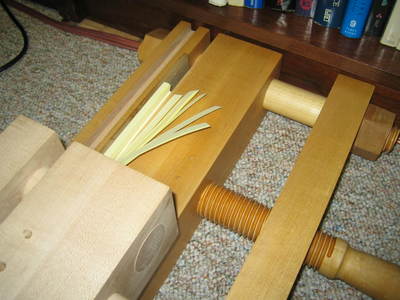
I couldn't wait to apply the finish: I had to see it cut something first! On my wife's desk I found some PostIt notes that were obviously too large:
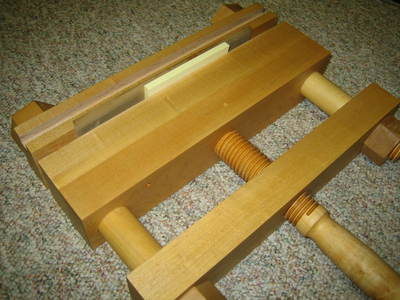
Since it worked, I decided it was worth varnishing. My wife also noticed that I'd left out a few details:

First I wiped on the Minwax "Medium Oak" rubbing oil to get the peculiar orange color I like. After two coats of that had dried, I applied two coats of the Watco Danish Oil.
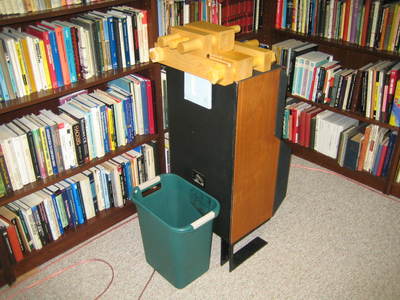
Traditionally, the plough and press sit on top of "The Tub", which is an open bench with a bin underneath to catch shavings. I dutifully went out and bought some nice maple to make a tub, but while I was at the Rockler woodworking boutique I found a roll of sticky padding. It isn't really sticky, but it has a lot of traction. It's sold for working on boards with a router. You lay a sheet of it on the bench, put the board on top and have at it with power tools. The pressure makes the board stick to the surface. It works really well. My wife confiscated the rest to put under kitchen cutting boards.
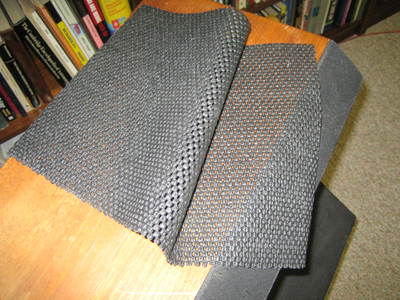
Anyway, this stuff holds the laying press firmly in place when ploughing. I let the book hang down over the side of the table. A wastebasket placed underneath catches all the shavings. I like to think it works better than a tub. Especially since I'm tired of working on this project.